
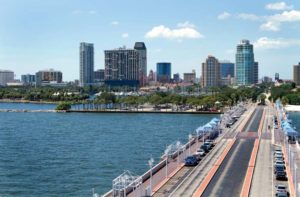
Sunning itself on a peninsula between the Gulf of Mexico and Florida’s Tampa Bay is the city of St. Petersburg. St. Petersburg registered 168 consecutive days of sunshine in the 1960s, setting a world record it still maintains today and earning the nickname the sunshine city. For long, St. Petersburg has been viewed as a destination for retirees dreaming of a warmer tomorrow but recently a younger crew had moved in intending to get their share of sunshine.
Fresh creative energy is today making its mark all over St. Petersburg especially on the city’s walls. St. Petersburg’s downtown has fast become one of the mural hotspots of the world. Join on a guided art walk, download the interactive app, or just keep turning corners and let the artwork take you by surprise.
Soaking up all that color under the Florida sun can be quite a thirsty work but fortunately, there is a place to rehydrate around every corner. Pull up a seat at one of the many watering holes in St. Petersburg and share refreshing ales and conversations with fellow beer lovers.
Once you have had your mind bent by St. Petersburg murals, head inside the Dali Museum to explore the surreal works by one of the greatest mind-benders in the world. Have your mind pores open a bit more at the Hooli Collection by the American Godfather of glass sculptures. Then head over to the Mauryan Arts Center to feel the heat.
St. Petersburg has become something of a Center for glass sculpture as master blowers pushed this centuries-old craft toward New Horizons. Since the 1960s when the artform exploded onto the scene. Experience the newest wave of glass expression from around the globe at the Imagine Museum.
Check out the Museum of Fine Art if you like your art a bit more old school. This museum houses treasures spanning 5,000 years. You can also step from Central Avenue into the sandstone canyon of the James Museum which brings the Old West to the East Coast. A short walk north from St. Petersburg’s downtown is the sunken Gardens, one of Florida’s horticultural jewels. Sawgrass Park is just a 15-minute drive further north. It is where a mile-long boardwalk crosses one of the Gulf Coast largest maple swamps.
You don’t have to travel far when it is time to hit the water. St. Petersburg’s Gulf Coast is paralleled by a 30-mile chain of sandy barrier islands each connected to the mainland by bridges. It is here, just a 10-mile ride from downtown St. Petersburg you will find some of America’s best beaches. Cool off in the waters of St. Petersburg beach whose pure sands are caressed by the same tides as Havana and Cancun.
Head south to Fort DeSoto Park for something quieter. It is a nature sanctuary spread across 5 island keys. Follow St. Petersburg barrier islands north to Clearwater whose kid-friendly vibes and warm shallow waters have long made it a favorite with families. Stop by the Clearwater Aquarium and meet folks dedicated to the rescue, rehabilitation, and release of injured marine mammals and reptiles.
Whether it is sharing a beer with the locals or leaving your footsteps on the ever-changing canvas of the sands, St. Petersburg have mastered the art of living and that as we all know is the best part of all.
 Empire State Building
 Grimaldi’s Pizzeria
  Edinburgh is one of those cities that are more than just mortar and bricks, it is a city built on ideas and a belief that the human experience can be greater than what it is today. Graced with more than 4,000 heritage-listed buildings, the capital of Scotland is one of the most beautiful cities in the world. Edinburgh is studded with spectacular gardens and lofty crags and throughout the year hosts festivals and parties like no other. Here are the top must-see attractions in Edinburgh, Scotland.
 Princes Street Gardens
 Atacama Desert and Mano del Desierto
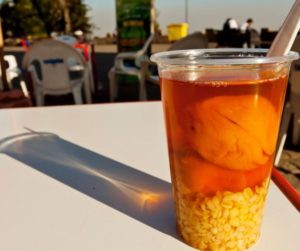 Mote con Huesillos